This is the wall art I have in one of our spare bedrooms. Our guest room currently houses my closet, my dresser, and a spare bed. I prepared the room as a sort of mother-in-law quarters for my momma to come stay with me when Birdie was born. Turns out that plan got scratched, but at least I now have a super cute guest room. And my momma is still welcome to stay anytime!
You will need:
Quilt hoops
Fabric (at least one inch larger than your hoop)
Glue gun
Iron
Scissors
Hammer and nails
Create, Craft, Conserve Tip: Use fabric scraps you have lying around, old concert or sports t-shirts, or sheets. Look for lightly used quilt hoops at yard sales and Goodwill. You can also spray paint your hoops before beginning if you don't like the natural wood look.
1) Iron your fabric. This is an important step in getting a smooth surface and avoiding wrinkles in your final product.
2) Loosen the fastener at the top of the hoop and separate the two rings. Lay your fabric over the outside hoop then press the inner hoop onto the fabric. This sandwiches the fabric between the two hoops. Tighten the fastener at the top of the hoop to hold the two hoops together securely.
Your hoop should now look like this.
4) Trim the fabric to approx. 1/2 inch all the way around the hoop.
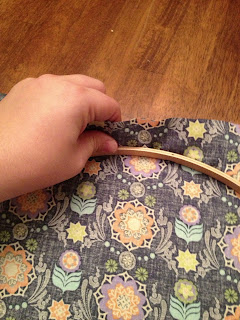
5) THIS IS THE MOST IMPORTANT STEP! You want to pull your trimmed fabric taught on all sides of the hoop. If you forget this step, the fabric will bunch and wrinkle, making the front of your hoop art uneven and bumpy.
6) Almost done. Last step! Apply a thin layer of hot glue onto the inner hoop and press the extra fabric into the glue, towards the inside of your hoop. The fastener on top of the hoop will keep the two hoops together. The layer of hot glue will help keep your fabric tight and allow the hoop to lie flat against the wall.
~ Ta-Da! ~
 |
| The finished product |
 |
| Using an old concert t-shirt |
 |
| Use different sizes and shapes for an eclectic look. |


No comments:
Post a Comment